

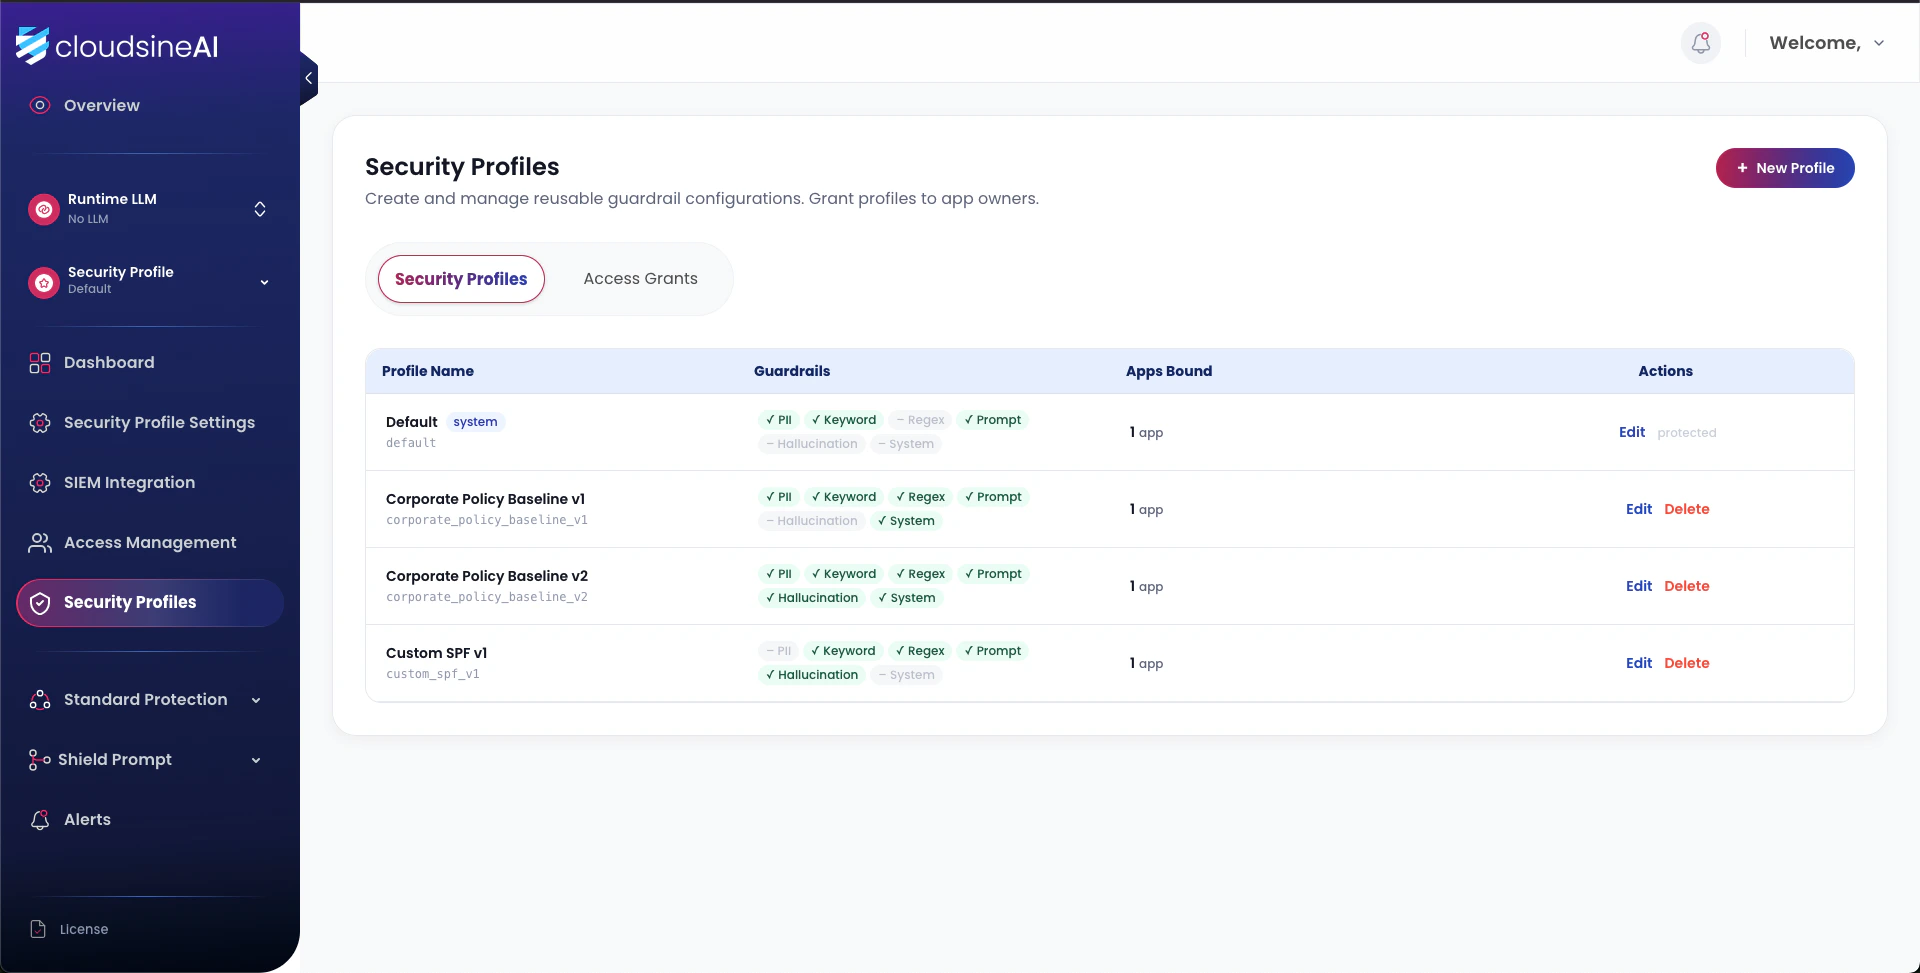
The Security Profiles management view. Each profile carries a guardrail mix and binds to one or more applications.
Create a profile
1
Navigate to Security Profiles
Dashboard → Security Profiles → Create Security Profile.
2
Choose Forwarding mode or Non-forwarding mode
See sections below for mode details.
3
Configure profile settings
Fill in the profile name, LLM backend settings, and deployment mode settings (see tables below).
4
Save
The security profile is created and ready to be bound to applications.
Forwarding mode
The GenAI application points its LLM endpoint at the Protector Plus FQDN. Protector Plus applies the security profile bound to the FQDN before forwarding to the origin LLM.Non-forwarding mode
The application calls Protector Plus directly using an org-wide API key and App ID. No FQDN is required. The application makes the final allow/deny decision based on the risk score returned by Protector Plus.Setting up authentication for Non-forwarding mode
1
Generate the org-wide API key
Navigate to Org Settings → Click Generate to create your organization-wide API key. Store it securely — it is shown only once.
2
Register your application
Navigate to Apps → Register App.Fill in:
- App Name: Human-readable name (e.g., “Customer Support Bot”)
- App ID: Unique identifier (e.g.,
support-bot) - Security Profile: Select the security profile you created
3
Use both credentials in API calls
Include both
X-API-Key (org-wide key) and X-App-ID (your app’s ID) in all API requests. See Authentication for details.Per-application isolation in practice
The diagram below shows two GenAI applications bound to two separate security profiles on the same Protector Plus instance. Each application is routed via a unique FQDN; Protector Plus applies the bound profile before forwarding to the corresponding LLM endpoint.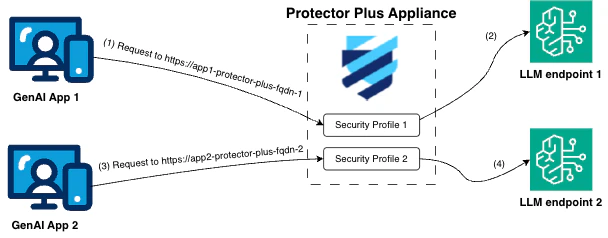
Per-application security profiles in Forwarding mode.
Tighten regulated apps
Apply stricter PII rules to customer-facing applications handling SG NRIC/FIN.
Per-domain thresholds
Tune prompt-injection thresholds higher for apps wired to sensitive tools.
Sandbox isolation
Run research apps with minimal guardrails in Monitor mode without blocking.
Multi-tenant control
Assign different profiles per tenant in shared-platform deployments.
Managing profiles
Viewing profile details
Navigate to Security Profiles in the dashboard sidebar to view all profiles. Click on a profile to view and configure its guardrail settings.Editing a profile
- Navigate to Security Profiles
- Click on the profile you want to edit
- Modify guardrail settings, thresholds, or backend configurations
- Click Save to apply changes
Viewing apps using a profile
On the Security Profile detail page, you can see which applications are currently bound to that profile.Removing a profile
- Navigate to Security Profiles
- Click on the profile you want to remove
- Click Delete
- Confirm deletion